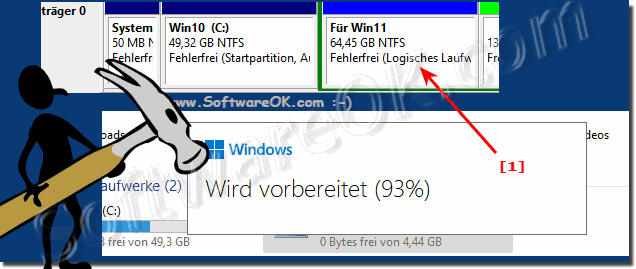
With little effort and with some settings it is easy to install Windows 11 side by side with Windows 10, why not if it is possible!Contents: 1.) ... Prepare hard disk under Windows 10!
|
| (Image-1) Install Windows 11 parallel to Windows 10! |
 |
2.) Create a medium that is bootable and causes no problems!
Of course you need Windows 11 on an installation DVD or USB stick.►► How do I install Windows 11 from a USB drive?
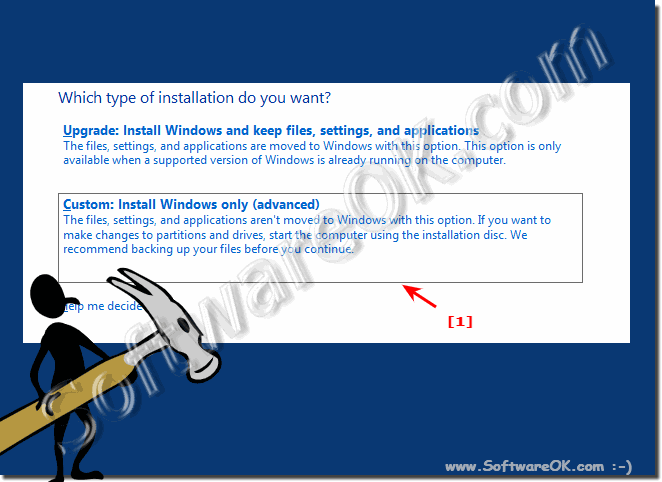
A custom installation is important, if no custom installation is made, it is an update from Windows 10 to 11.
From here it is the same procedure as:
►► A clean new installation of Windows 11!
It is always important to ensure that you do not accidentally select the partition on which Windows 10 is located and overwrite the data from Windows 10.
| (Image-2) Install Windows 11 and Windows 10 parallel! |
 |
3.) More tips for installing Windows 11 parallel to Windows 10!
On many computers where Windows 10 works without any problems, you can quickly encounter hardware problems and that Windows 11 cannot be installed. You can work around this, for example with Rufus or other external tools that remove these blockages.
However, if the computer is actually not sufficient for Windows 11, the problems can arise later. For this reason, a parallel installation of Windows 11 to Windows 10 is not so wrong.
►► Windows 11 Home or Pro version?
►► Back to Windows 10 from Windows 11?
►► Should I hack Windows 11 for unsupported PCs?
►► A clean new installation of Windows 11!
There are many benefits to installing Windows 11 alongside Windows 10, especially if you are on a computer where Windows 10 works fine, but may encounter hardware issues that could prevent Windows 11 from installing. Here are some additional tips to complete this parallel installation successfully:
1. Check hardware requirements:
Make sure your computer meets the minimum requirements for Windows 11. This includes processor, RAM, hard drive space and TPM version. You can find this information on the official Microsoft website.
2. Activate TPM (Trusted Platform Module):
Windows 11 requires TPM 2.0. Check your computer's BIOS or UEFI to see if TPM is enabled. If not, enable it and make sure it is updated to version 2.0.
3. BIOS/UEFI Update:
Update your computer's BIOS or UEFI to the latest version. Often, updated firmware versions offer improved compatibility and support for new operating systems such as Windows 11.
4. Back up your data:
Before you begin the installation, back up all important data on your computer. It is advisable to create a complete backup of your system in order to be able to restore in case of any problems or data loss.
5. Using a boot manager:
Instead of installing directly from the Windows 11 ISO, you can use a boot manager like EasyBCD to simplify parallel installation and manage boot options.
6. Hard drive partitioning:
Create a separate partition on your hard drive for installing Windows 11. This will allow you to manage both operating systems separately and minimize data integrity issues.
7. Check driver compatibility:
Make sure there are appropriate drivers available for your hardware in Windows 11. Visit the manufacturers' websites to download and install the latest drivers for your components.
8. Download Windows 11 ISO file:
Download the official Windows 11 ISO file from Microsoft website to ensure you are using a trustworthy and up-to-date version.
9. Update security software:
If you use security software such as antivirus programs or firewalls, make sure they are compatible with Windows 11 and, if necessary, update them before installing.
10. Be patient and respond to problems:
Various issues may occur during the installation of Windows 11. Remain patient and research solutions when errors occur. Forums and online communities can be helpful resources for solving specific problems.
By following these additional tips and completing the installation carefully, you can successfully install Windows 11 alongside Windows 10 and minimize possible compatibility issues.
FAQ 249: Updated on: 7 April 2024 18:02
