Marking photos or pictures correctly and quickly is an important task when managing pictures!A marker is not only needed for the double image search, sometimes it is quickly hundreds of photos after you have transferred these photos to your computer, now you want to select the best photos. Markers are an important and easy way to quickly move, copy, delete, ..., or separate their photos in large numbers in the standard MS file explorer, as in the quad explorer! 1.) ... Activate suitable miniature view size!
|
| (Image-1) Mark images in the File Explorer view! |
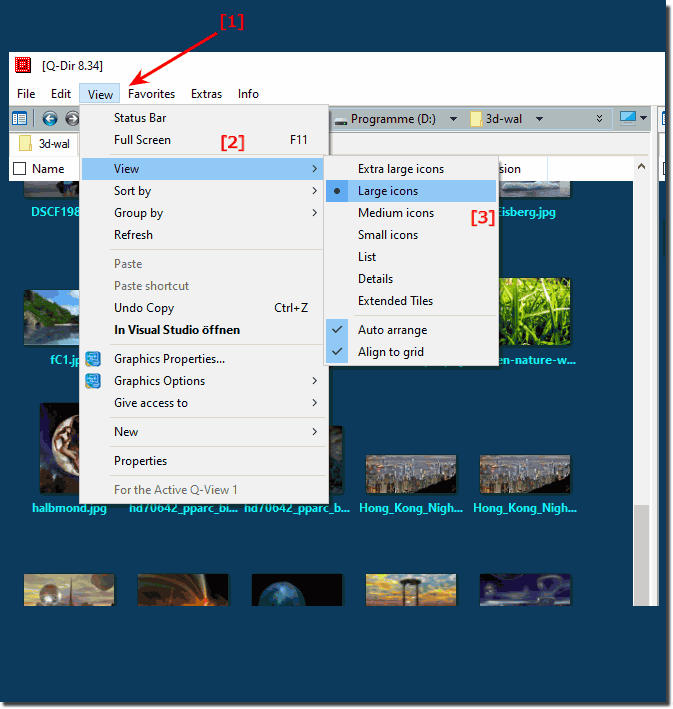 |
The thumbnail view helps you to see marked pictures, by activating the thumbnail you mark the desired pictures faster. When the File Explorer view on extra large icons, large icons, medium icons, File Explorer displays thumbnails of images so that users can easily highlight image files!
2.) Activate the checkbox to mark pictures!
Optionally activate the checkbox for marking, this is then located in the top left corner of the thumbnails. Click the checkbox to select or deselect photos. The photos remain highlighted until the check box is cleared.| (Image-2) Activate the checkbox to mark pictures! |
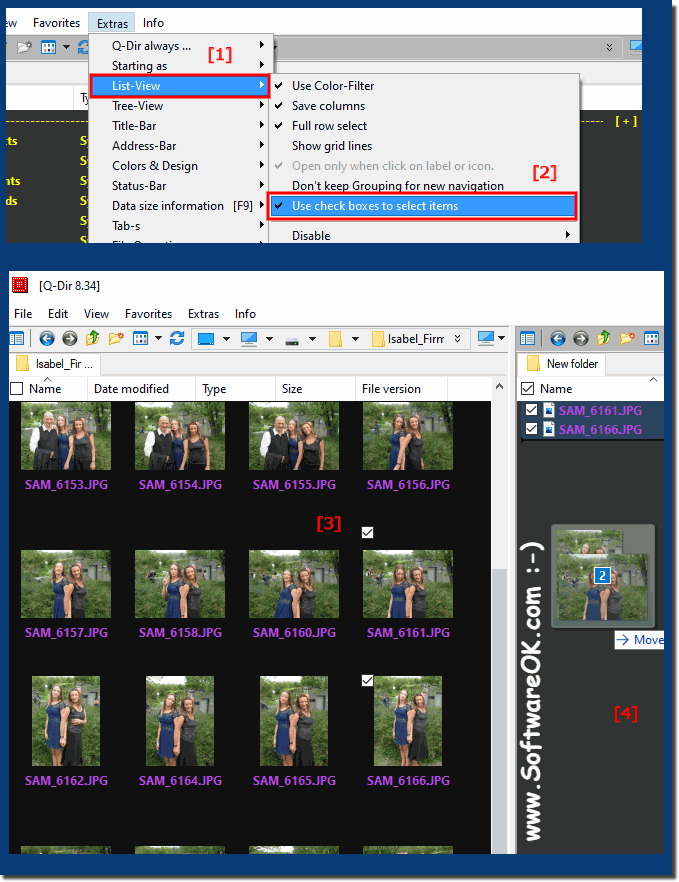 |
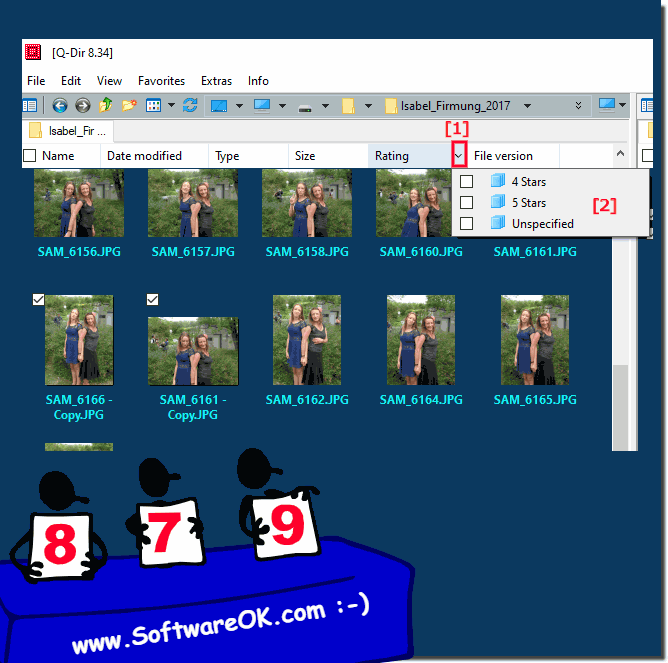
You can access all tagged photos with one click by ticking the checkbox labeled tagged by ratings or other criteria, a method of separating to organize and summarize your photos faster, to move the files to different folders. Checkboxes for marking pictures are very practical because you can't slip so quickly!
| (Image-3) Checkbox marked for ratings in File Explorer! |
 |
3.) How to mark pictures with the keyboard + mouse without checkbox!
With the keyboard you can also mark pictures effectively, with the help of the CTRL + mouse clickPlease hold down the CTRL key and click on the files with the left mouse button
The first click on a file is for selection, the second click is to deactivate (deselect) ) the file or folder!
| (Image-4) Mark pictures with keyboard and mouse! |
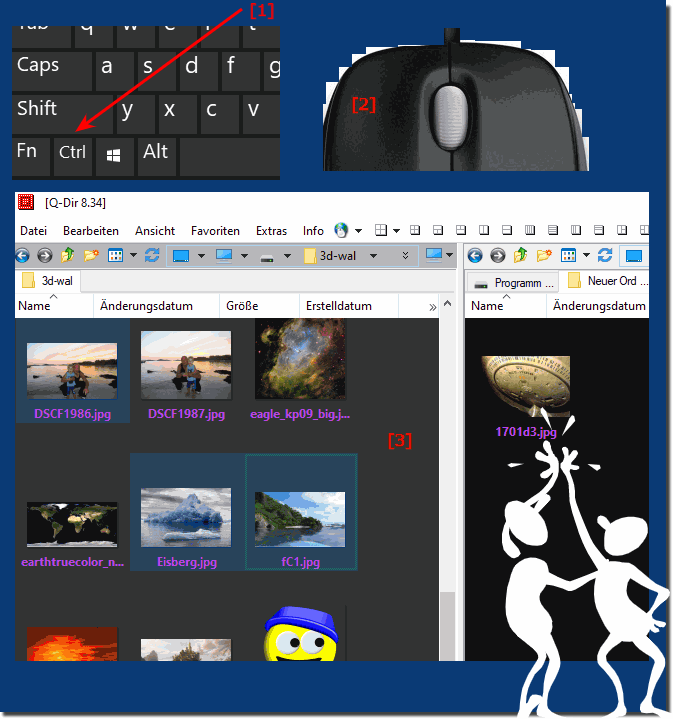 |
the pictures with the keyboard and mouse is one of the preferred methods for marking pictures / photos, since you benefit from the advantages of both peripheral devices, the marking is very quick , and
4.) How to mark pictures only with the keyboard!
You don't always need the mouse to mark files, experienced image markers can only do it with the keyboard, why not you too?
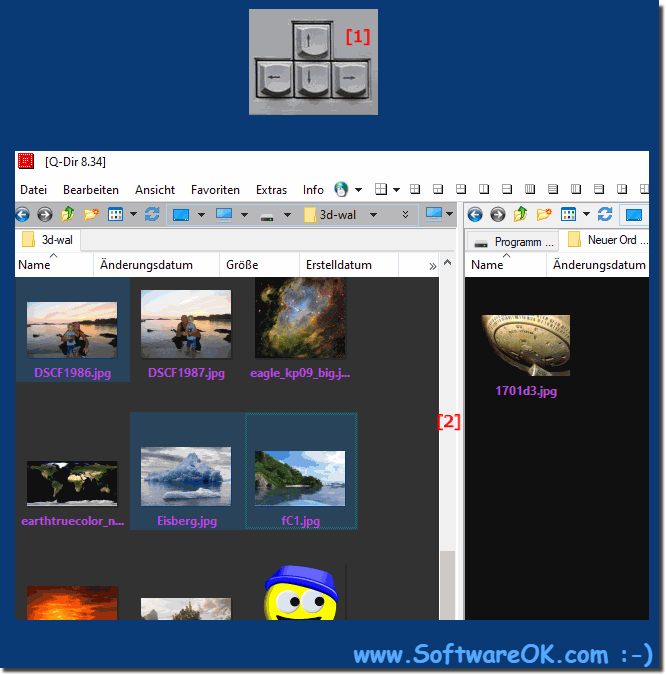
Please hold down the CTRL key, use the left and right arrow keys to move through File Explorer and press it the SPACEBAR to highlight!
The first press of the SPACEBAR is for marking, the second click is for de-marking (remove picture marking)!
| (Image-5) Mark images in File Explorer only with keyboard! |
 |
How to unmark a selected picture or confirm the selection for all marked pictures, marking or unmarking is very quick
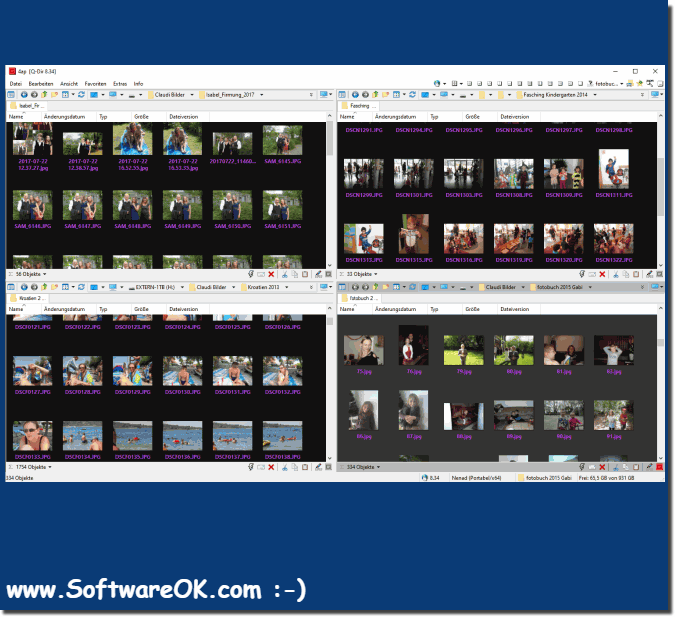
5.) Should I use 1, 2, 3 or 4 Explorer views!
Before marking or after marking the selected pictures, you can decide whether you want to use one or more Explorer windows to move, copy, delete, ... between the folders!| (Image-6) Use multiple File Explorer to highlight, copy, move Images! |
 |
6.) Marking pictures is an important task!
Markers are there to temporarily separate images. Once tagged, you can remove the tags from the photos afterwards, but categories, ratings and folders are the more effective solution for organizing and summarizing your photos in the long run.
You can quickly mark several pictures with the mouse or keyboard, but with a photo or picture marking it is not the quantity of the marking speed that is important, but rather to achieve a qualitative, targeted marking of the pictures.
You can quickly mark several pictures with the mouse or keyboard, but with a photo or picture marking it is not the quantity of the marking speed that is important, but rather to achieve a qualitative, targeted marking of the pictures.
FAQ 124: Updated on: 14 May 2021 16:59
